Showing posts with label crafts. Show all posts

Monday, December 27, 2010

Little Ms. Claus Dress: What I'm Makin' Monday

Monday is almost over, but I figured it's better I post it today than next Monday when it's WAY after Christmas! I'm so proud of my creation!
I can't take all of the crecit cause I got an idea to make a dress like this after seeing a similar one by my friend Jess's sister who own's the shop Our Little Tutus. So if you think you can't make one of these, you can buy one for under $30!

I saw a picture of her Santa tutu dress and decided to create one with the flair of a pettiskirt. So I made a tutu pettiskirt style dress using tulle, ribbon, a red crocheted baby beanie and headband and feathers/more tulle.

I made it by hand sewing together a red baby beanie I opened up to a wide baby headband.

Then I made the tutu dress like I explained in this tutorial. Then I tied small white strips to the ends of the red tulle skirt to make it look like a mock pettiskirt.
I added more frill by hand stitching a feather boa-like embellishment to the top front of the dress bodice. Note: DON'T stitch it all around. I did that at first and forgot that she'd have to fit in it. The bodice gives but the feather's didn't so I had to undo half of my stitching around the back.

After a photoshoot with the feather's I realized baby drool and feathers don't mix so I went back and tied white tulle to the top of the bodice (the same way I did with the red around the bottom) and trimmed it all down to the same length.

I added a black satin ribbon as the Ms. Claus belt with a rhinestone buckle (I found at Hobby Lobby).
TADA!

Monday, April 12, 2010

What I'm Makin(g) Monday: Wall Vinyl Decal! {And Giveaway!}

I'm sucking at this meme thing already. I mentioned planning to start one this week, and here I am, finally posting it Monday afternoon...

In an effort to make myself more crafty, and also brag a little about some of my accomplishments, I thought it would be fun to make Monday my craft-related post day. It'll also hopefully be a fun way to see other crafts out there that I haven't heard of and that I'd like to maybe try (or buy) when others link up and share their skills.

Here's the idea: Share a post, a link, a photo, a tutorial, whatever of something you've made. It can be a craft, food, digital design, whatever!! Maybe later I'll get specific with some prompts but for now people can just share whatever they want. I'll also post something I've made which may or may not include a tutorial. For the first little while, everyone who participates will be entered for a giveaway, and I'll announce what the giveaway item is that week. Some may be big, and some may be small, some maybe even be nothing at all... We'll see how it goes. So if you know wannabe crafters or chefs out there, or people who already are, let them know there's another place to share!

This week will be a little different since it's short notice and it's the first week! But there's still a giveaway everyone can enter at the end.

So let's get this party started... As part 3 of my Operation Nursery Makeover, and my first ever installment of "What I'm Makin(g) Monday" I made a wall decal for Spawnie's Nursery.
Trading Phrases contacted me a couple of months ago about their beautiful wall vinyl designs. I checked out their nursery designs and found the perfect one for Spawnie's room!
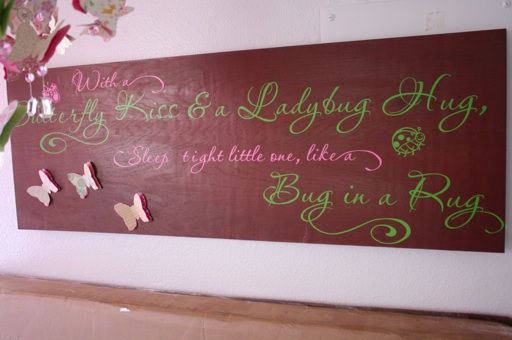
It says "With a Butterfly Kiss and a Ladybug Hug, Sleep Tight Little One, Like a Bug in a Rug." I thought since her room is butterfly themed, and I call her my little bug it was PERFECT.
They were really nice and suggested I get color samples so I knew for sure it would match our room. I did as they suggested and narrowed it down to three greens and three pinks, they sent me a postcard with little stickers of the vinyl's color and I picked my two favorite.

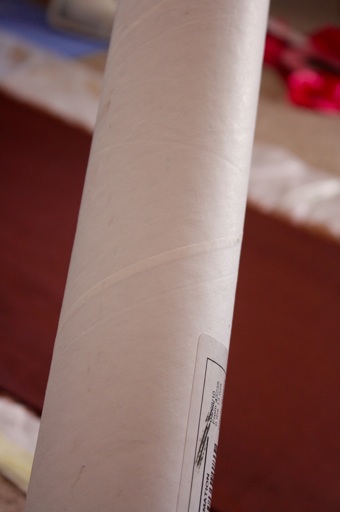
Shortly after I got the vinyl in the mail all rolled up nicely in a tube, and was ready to get to work! But I had a dilemma... Our walls are a little lumpy, "textured" I guess is the correct term. The nice people at Trading Phrases told me it would still work, but the more I thought about it, the more I realized I didn't want to stick it directly on my wall. I remembered a project I did once for my living room and got an idea!
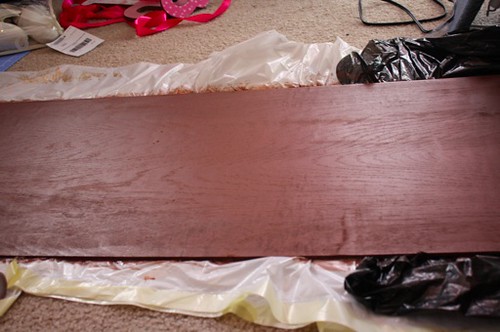
First, I bought some wood at Lowe's, I bought a big piece that was 4 feet long, by 2 feet wide, and got it cut down to 17in wide (the size of the vinyl). It wasn't thick... About 1/4 of an inch.
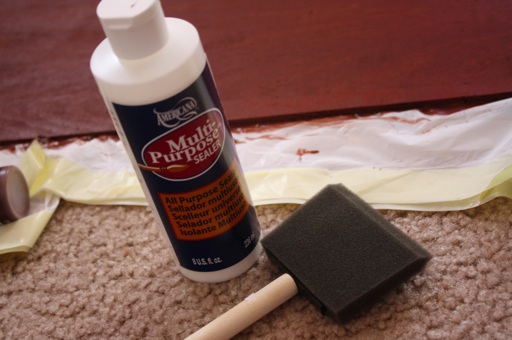
I got home and painted it with two coats of brown, and a coat of sealant. You can get sealant at any craft store, and it's not too expensive... about $5 for a bottle that should last awhile.
I made sure to get the sides and everything real good, and then I waited for it to dry.

Now it's time to get the vinyl! ... See where I'm going with this? One thing I like about Trading Phrases is they sent two pieces of "practice vinyl" with smaller phrases so I could get the hang of how to peel the papers and stuff before I did it for real... Good idea cause reading the instructions were a little confusing at first, but after I tried it a couple of times on the bottom of the my door for practice, I got the hang of it.
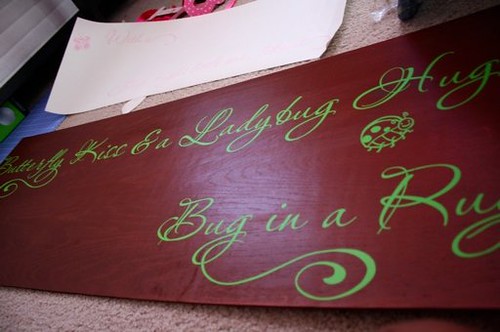
Now it was time to lay it out on the wood. Since mine came in two parts I took some time to mark where I wanted each piece to start and stop. Since the wood was practically the perfect size I had to make sure no words were falling off the edge.
I got it lined up and put down the first part.
Then the second part! And then covered both with another layer of sealant. I noticed there was some blank space in the bottom corner of the wood, and normally on the wall I think it would look fine, but since it was plain brown there I decided to spruce it up a little with some paper butterflies I had left over from the butterfly mobile I made. Then... TADA!!!!
What do you think? See, now the whole point of this meme thing is to get encouragement so don't let me down!

I'm really happy with how it all turned out, and the best part is I can take it with me when we move!

If you DO put it on the wall, it's way easy to take off just by peeling, or adding a little heat (with something like a blow dryer) and peeling.

Want to try this craft yourself? Trading Phrases has offered to donate this wall decal to one of my readers!! It'll come in black 24in X 11in, it's over a $39 value! And if you want to add it to a plaque, now you know how!! Want to get to know Trading Phrases better? They're @TradingPhrases on twitter and they have a Facebook Fan Page.

*HOW TO ENTER*
Visit Trading Phrases and tell me your favorite wall decal in the comments. That's all! See? Easy peasey!

*FOR EXTRA ENTRIES*
-Be(come) a follower of my blog
-Link up to What I'm makin(g) Monday this Monday 4/12 or next Monday 4/19 or the last day of the giveaway 4/26, and leave a comment letting me know you did! (2 entries for each time you participate!)

Contest ends April 26th, at 11:59pm. Random.org will choose a winner! Good luck!

Did you make something? Please share! In your post, link back to "What I'm Makin(g) Monday" and link up!

Friday, March 26, 2010

How to Make Baby Leg Warmers

In my quest to make myself more crafty, and to make myself feel like a domestic diva I want to document my different projects progress on my blog. I'm hoping for one crafty-related post a week, and I've been making Spawnie a lot so it shouldn't be so hard!

I can't take all of the credit for my ideas though, so I'll show you where I get them!

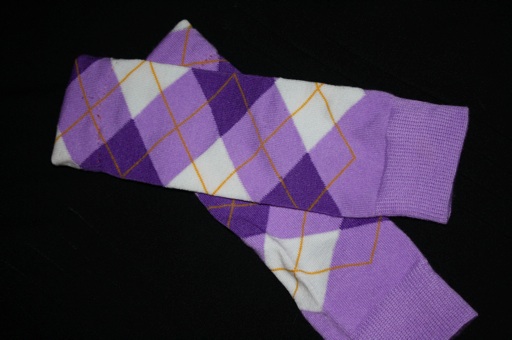
I had never heard of baby leg warmers or BabyLegs until a few months ago. I hear they're amazingly convenient for diaper changes cause you don't have to take down/ unbutton any pants. They're also nice to keep your baby's legs from getting rug burn while they're crawling around.I thought they were totally adorable but worried of Spawnie was a boy they may look a little silly on him. I took a chance though and bought some leg warmers from Dittany Baby. But they're called skidpants there. I'm still not sure of the difference, I think it's a brand thing, but either way they're adorable! I bought these BYU ones on sale for $4.50 at Dittany baby!Once I found out Spawnie was a girl I wanted more! I started shopping around but realized the price for one pair easily is $12-$15 for a PAIR! Don't get me wrong, I'm all for spending the money on cute stuff, but I'm also a bargain hunter.

I was tweeting with people about baby leg warmers and a few women told me they were really easy to make. I was worried shopping for fabric, cutting and measuring would take me forever so I was a little hesitant at first but a few sent me links to a tutorial on how to make baby leg warmers from knee socks!

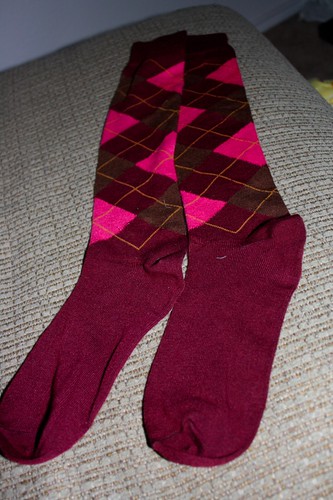
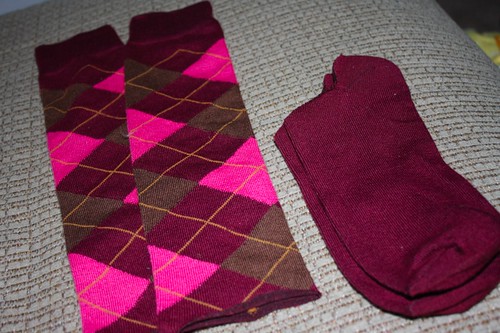
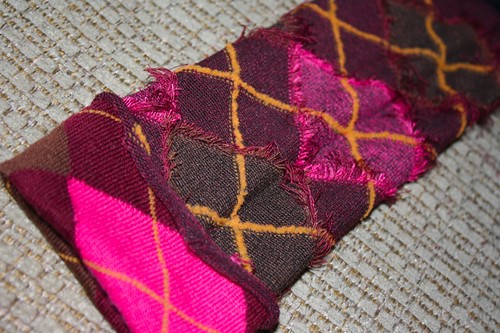
So, to see how easy it was I tried it myself! I bought a 6 pack of women's knee socks off Ebay for $13.1. Cut the feet off the bottoms.2. Turn them inside out and fold up the bottom.
3. Stitch around them flip right side out. (I hand stitched these during my lunch break at work one night).Viola!! It took seriously about half an hour to make a pair and that's because I was HAND STITCHING. My sewing machine is having some problems but it would literally take me about a minute to make a pair using my machine. But that should give women who don't have/ know how to use sewing machines some courage.

So there you go! I'll make 6 pairs of baby leg warmers for $13. Not bad eh? Hopefully I can keep this craftiness up! I'm becoming more domestic than I ever imagined!

Sunday, July 19, 2009

The Baby Shower--Diaper Cake Tutorial!

The baby shower was a SUCCESS! Did I mention it was the first ever baby shower I hosted? I was stressed out to the nine because we had to plan it so soon. One of the planners is moving next month and we all had to plan around our vacations. Considering all of that I think it turned out really well! I'll add another post later with more info on the games we played, more pictures of friends and everything, but this post I wanted to dedicate to my gift to her... A diaper cake.

You may remember the first one I made... Lopsided. And the stand was pretty lame (actually I did cut it in a circle later I didn't hand it to her like that!). I think the problem I had was the fact that I stacked all of the diapers on one another and didn't have a solid base in between them. With this one I read a diaper cake tutorial online that helped. And I'm going to post my own version here for you all to see! I wanted to do a video blog but I was in too much of a hurry, so I hope this helps!
First, don't be like me. I went to Hobby Lobby and pranced around the ribbon section for a long time trying to decide which color I wanted. If you were on Twitter at that time you were probably one of the people who helped me-THANK YOU! My husband was waiting in the car and after (I'm embarrassed to say)... A half hour!! ..He came storming in looking for me! Luckily I had narrowed it down to this color.

Heidi (my friend) didn't want "pink" and the theme in her baby's room is "tropical sunset" so I went with orange ribbon. You'll see what this is for soon.

Next I bought flowers for the topper... Some people use stuffed animals, but I had a vision in mind and flowers fit into that better.
I found this for a dollar and thought it could make a nice touch. I didn't know how I'd fit it all in at the time but I just planned to figure it out from home.
Next I bought a tall (about a foot) cardboard cylinder (maybe 4-6in around) to use to make a stand. I also bought a big piece of cardboard (about $1.50) to use as the base.
Then finally, yes, I bought diapers. Some friends on Twitter told me the Pampers Swaddlers are best cause they're all white, but I think any kind works. Someone told me they've made one with cloth diapers, which would be cool but WAY more expensive! These kind were soft but a little pricier than the other disposables ($9.90 for a box of 40 sz1) I ended up having to send my husband out to buy another bag (and to be honest I'm surprised he found the right ones), but I only used about 10 out of the second bag... So about 50 for me, total.
Now to making it... First I rolled up all of the diapers. I bought a 200 box of clear headbands for $2. I rolled up the diapers. You can do it either way, but I try to keep the size with print on the inside.

I cut out circles for the base, I used a large dinner plate then a smaller salad plate and then a bowl for my sizes.
I covered the circles with tissue paper, so if it shows at all it's white.
I cut the cylinder thing into two diaper-height cylinders. Then I glued it onto the cardboard circles. I put the bottom and middle layer together first before adding the top, smallest circle.

After that I added more tissue paper around the edges of the circle so it could look pretty--I dunno, you don't have to do that. I also added some greenery to the smallest circle. Sorry I don't have pictures of that. I just used hot glue and scrunched it up, and glued it around the edges.

Then, I wrapped the diapers around the bottom layer (the bigger circle with the diaper-height cylinder in the middle). I did two layers, so it's thicker. I used a big rubberband to hold them all together... you need four hands to get it to stay, so hubby came to help me here.

On the middle level I did the same exact thing except just one layer of diapers around the middle cylinder. Same thing... Four hands to add the rubber band to hold it all. --At this point it may look lopsided and weird but done worry, trust me, read on!

Now you add the top layer--The smallest, bowl-sized circle. Here I used a smaller cardboard cylinder--An empty toilet paper roll was the perfect size, I didn't even have to cut it--and I wrapped a layer of diapers around it.

Then is the fun part!! Add the ribbon around each layer to cover up the rubber bands. Used hot glue just to close the ends of the ribbon together, you don't have to glue around the whole cake. I tried to hot glue each layer together near in the same spot so I could cover them. And then add flowers and go crazy! I cut some of the greenery around the flowers off in the beginning to add some flare underneath the diapers on the bottom and top layers, and I added some flowers to hide where I glued the ribbon ends together, and just glued them to sporadic parts of the diapercake to make it look nice.After adding the ribbon is when I really noticed it all coming together. I didn't even ask my husband what he thought before he noticed what I was doing and said "That looks really good Jenn!" It made my day! Since then I've been showing pictures to EVERYONE including YOU! So tell your friends! I'm really proud, and Heidi LOVED it! She can use the diapers if she wants but she said she never wants to take it apart, but keep it as a decoration in the nursery (which may be a good thing cause I went a little crazy with the glue in some spots).

I hope this little tutorial helps! I've never done a craft how-to before (maybe because I'm not crafty), but this was fun! Maybe it'll motivate me to do more! If you have questions feel free to ask me in the comments section! This was only my second one, but it was a HUGE improvement in my opinion!

Let me know what you think!

Monday, January 12, 2009

The Craft

I've had two dilemmas the past week or so. 1. Trying to figure out how to perform the art of baby headband making, like I discussed in a previous post. And 2. thinking of a way to hold my first giveaway!... That's right! I'm going on a week-long cruise next week (a post to come on it soon) and I'm thinking of having a little contest while I'm gone.

Well, I think I've figured out how to make these beautiful little crafty delights and I'm going to experiment and give my first few away!! Details on the giveaway will come next week, but aren't you so happy I'm giving this a try? I'm still thinking of something cute for little boys (have any ideas? I'm up for experiments). Oh, don't be mad if their ugly. Ok? I didn't say I'm perfect. I'll have more details on the contest next week!


Tuesday, December 30, 2008

The Homemaker in Me

I think I've figured out why I don't like cooking... you eat it and it's gone. There's no lasting enjoyment or opportunity to "show off" as in other homemaking projects. My husband thinks it's strange that I take pictures of everything I cook. I've been really good lately about making stuff... It's still been ingredients all conveniently placed in a box, but a couple of weeks ago I made this chicken Alfredo stuff and I had to cook the chicken on the frying pan and cut it and everything! Yes, I took a picture...I accidentally deleted it though and I'm really mad!

Anyway, like I was saying, I like some other homemaking projects like sewing for instance. I never thought I'd want to sew but after seeing a lack in cute matching collars and leashes for my boy dog I decided to learn how to make him some! Now I have my own small business making collars for a shop in Utah as well as lots of people here in Austin!

Lately I've noticed some of my friends dress up their cute little girls in the most ADORABLE hair bows!! I MUST learn how to make them! Anyone know how? I can't imagine it being very difficult. It almost seems like a matter of gluing.


I'm hoping if I start soon I can have a different color/design for every day of my darling little girl's infant/baby/toddler life!... And hopefully even have some for shower presents along the way.

I've told myself I WILL NOT buy things for a baby I'm not pregnant with... But I never said I wouldn't MAKE something *evil smirk*