Showing posts with label tutorial. Show all posts

Monday, December 27, 2010

Little Ms. Claus Dress: What I'm Makin' Monday

Monday is almost over, but I figured it's better I post it today than next Monday when it's WAY after Christmas! I'm so proud of my creation!
I can't take all of the crecit cause I got an idea to make a dress like this after seeing a similar one by my friend Jess's sister who own's the shop Our Little Tutus. So if you think you can't make one of these, you can buy one for under $30!

I saw a picture of her Santa tutu dress and decided to create one with the flair of a pettiskirt. So I made a tutu pettiskirt style dress using tulle, ribbon, a red crocheted baby beanie and headband and feathers/more tulle.

I made it by hand sewing together a red baby beanie I opened up to a wide baby headband.

Then I made the tutu dress like I explained in this tutorial. Then I tied small white strips to the ends of the red tulle skirt to make it look like a mock pettiskirt.
I added more frill by hand stitching a feather boa-like embellishment to the top front of the dress bodice. Note: DON'T stitch it all around. I did that at first and forgot that she'd have to fit in it. The bodice gives but the feather's didn't so I had to undo half of my stitching around the back.

After a photoshoot with the feather's I realized baby drool and feathers don't mix so I went back and tied white tulle to the top of the bodice (the same way I did with the red around the bottom) and trimmed it all down to the same length.

I added a black satin ribbon as the Ms. Claus belt with a rhinestone buckle (I found at Hobby Lobby).
TADA!

Tuesday, May 4, 2010

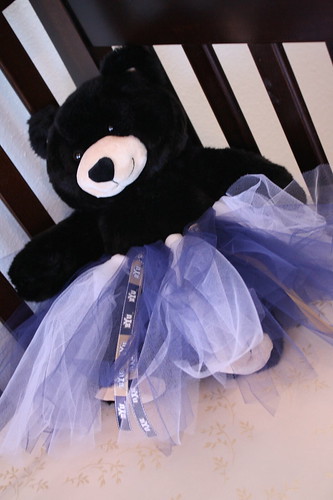
Tutus Galore {and Giveaway}!: What I'm Making Monday

What I'm Making Monday
When I found out I was having a girl I knew I was in trouble. KNEW I was in trouble. I've been the most prissy little thing on the block practically from birth myself. My mom taught me well, and I plan to do the same with my little one.

Now tutus are great. I never was a ballerina (pigeon toed plies don't work) but I loved to dress like one. Even if that meant tights under bathing suits, I did what it took. However, I don't recall having a tutu. My daughter won't have that problem. And neither will yours!

I was on Twitter one day rambling about wanting to buy a tutu at an affordable price when someone directed me to this tutu tutorial.

Wow, seriously, is it that freaking EASY?!

Yep.

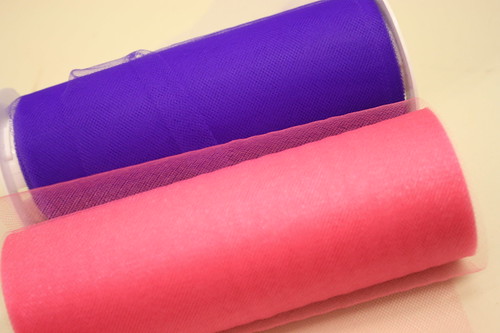
I went to Hobby Lobby and bought two rolls of tulle.. The ones that are 25 feet by 6in for $2.99 each. THIS made it WAY easier. The tutorial doesn't mention these things!


I also bought a roll of elastic for under $2.


Cut the elastic. I measured it to be about 6-8 inches I believe using some other of Spawnie's clothing to gauge how wide to make it (waist size). It also stretches out a couple of inches after you add the tulle so be aware of that.


I stitched it together with my sewing machine. It's not working well right now but it was able to hang in there and stitch a half and inch back and forth for me in about 15 seconds.


All I had to do was cut the tulle twice the length I wanted it to be on the skirt.

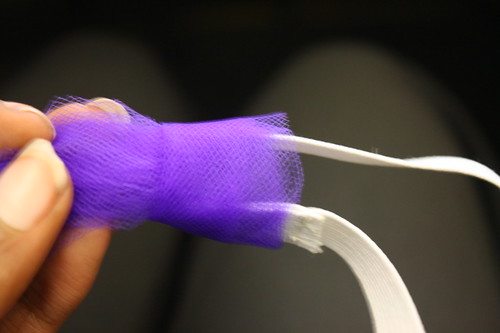
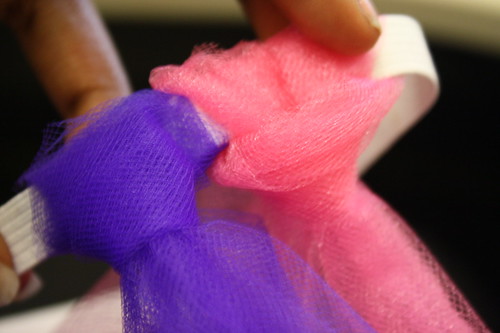
Then loop the tulle around the elastic like so...


I wasn't a boyscout so I'm not sure the exact name of this knot but it's EASY! Just loop it under the elastic and pull the tulle through the other side. Doesn't matter which way the knot sits cause you can turn it before pulling it tight.


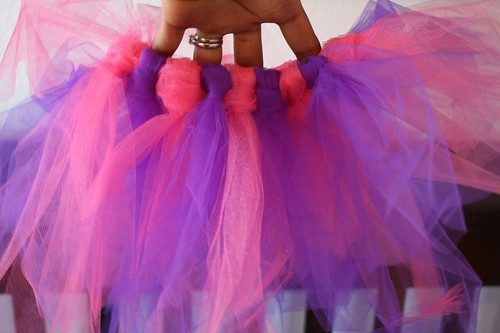
Do that over.


And over, and over!


TADA!!!

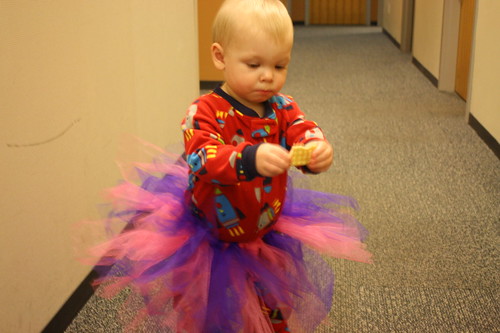
The only baby I had to model it at the time was a boy :( Don't worry, his parents knew this was for a project of mine, plus he loved it too! He's one so I think it can fit from infant up to about a one year old!


You can also add ribbon and flowers and fun things to them if you want. Mix and match the colors or make them solid colors, HAVE FUN with it!


*** NO SEW TIP***
If you don't want ANY sewing at all (cause of the elastic step in the beginning) you can use RIBBON instead. Satin ribbon works great, but make it EXTRA LONG so you can tie a pretty bow once it's on your little princess. Tie the tulle around the ribbon the same way as shown earlier then tie it around your little girl when it's all done! No sewing needed!!


The 2 rolls of tulle made two matching tutus so I gave one to a friend (with a baby girl) and Spawnie has the other waiting for her! I can't wait to show you another photo with her in it! Overall that cost me about $8 for two tutus... Not bad right?


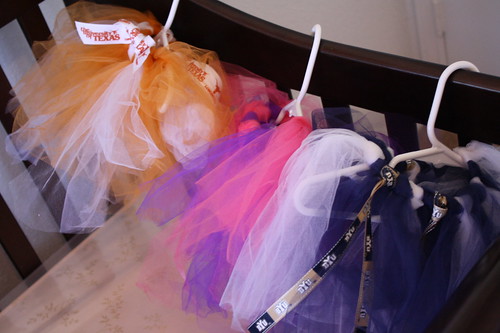
THEN I went CRAZY and bought TONS of tulle on Ebay... TONS. Here's my tulle drawer And that's not all of it cause it was just 50% off at Hobby Lobby and I got 3 more rolls. Most of the tulle I bought on ebay was the same roll size (it cuts down on cutting SO MUCH) and I got several for about $1 and free shipping! So I've been making my little girl tutus for under $2 now and Spawnie has a collection of ooh, I think about 8 tutus so far. I've taken a break from tutu making to finish her room etc, but once I'm done I'll be back to upping her collection!

And now you can make some too!

Don't have time or patience to make you own tutu? I recommend Cutie Patutus! They have the most ADORABLE selection of tutus that are so elaborate I couldn't even begin to figure out how to make!

Next tutu I make for Spawnie I'll make a matching one for one of you to win! I usually have enough tulle for two but she doesn't need two duplicates, SO one of my blog followers who leaves a comment will be entered to win a matching tutu of Spawnie's! Colors not yet determined but I promise they'll be cute.
Want an extra entry? Participate in What I'm Makin(g) Monday. Post this button on your blog and link up your What I'm Making post!
What I'm Making Monday


Friday, March 26, 2010

How to Make Baby Leg Warmers

In my quest to make myself more crafty, and to make myself feel like a domestic diva I want to document my different projects progress on my blog. I'm hoping for one crafty-related post a week, and I've been making Spawnie a lot so it shouldn't be so hard!

I can't take all of the credit for my ideas though, so I'll show you where I get them!

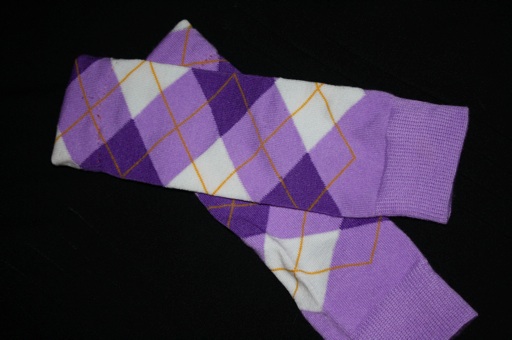
I had never heard of baby leg warmers or BabyLegs until a few months ago. I hear they're amazingly convenient for diaper changes cause you don't have to take down/ unbutton any pants. They're also nice to keep your baby's legs from getting rug burn while they're crawling around.I thought they were totally adorable but worried of Spawnie was a boy they may look a little silly on him. I took a chance though and bought some leg warmers from Dittany Baby. But they're called skidpants there. I'm still not sure of the difference, I think it's a brand thing, but either way they're adorable! I bought these BYU ones on sale for $4.50 at Dittany baby!Once I found out Spawnie was a girl I wanted more! I started shopping around but realized the price for one pair easily is $12-$15 for a PAIR! Don't get me wrong, I'm all for spending the money on cute stuff, but I'm also a bargain hunter.

I was tweeting with people about baby leg warmers and a few women told me they were really easy to make. I was worried shopping for fabric, cutting and measuring would take me forever so I was a little hesitant at first but a few sent me links to a tutorial on how to make baby leg warmers from knee socks!

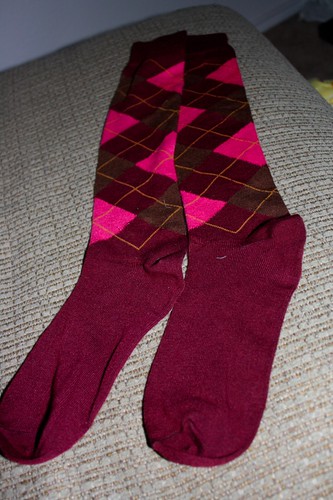
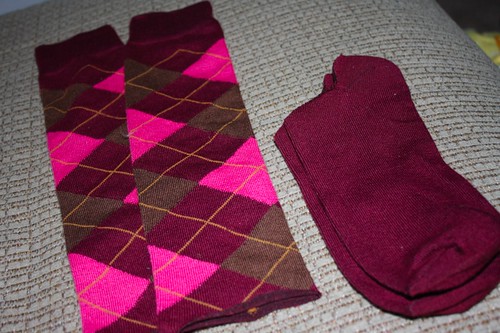
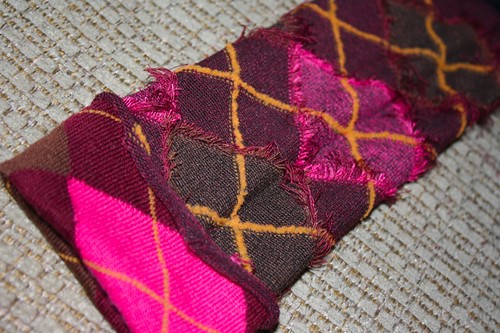
So, to see how easy it was I tried it myself! I bought a 6 pack of women's knee socks off Ebay for $13.1. Cut the feet off the bottoms.2. Turn them inside out and fold up the bottom.
3. Stitch around them flip right side out. (I hand stitched these during my lunch break at work one night).Viola!! It took seriously about half an hour to make a pair and that's because I was HAND STITCHING. My sewing machine is having some problems but it would literally take me about a minute to make a pair using my machine. But that should give women who don't have/ know how to use sewing machines some courage.

So there you go! I'll make 6 pairs of baby leg warmers for $13. Not bad eh? Hopefully I can keep this craftiness up! I'm becoming more domestic than I ever imagined!

Saturday, March 13, 2010

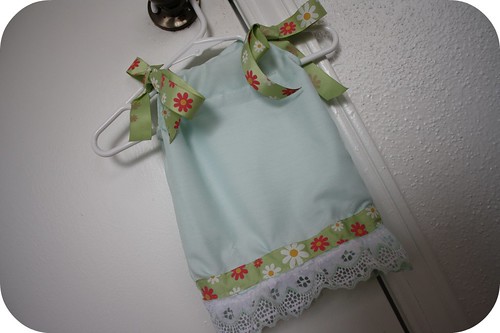
I Made a Pillowcase Dress!

I'm standing by my stance that I'm not crafty... But I'm taking a stab at new crafts as a part of my apparent nesting craze.

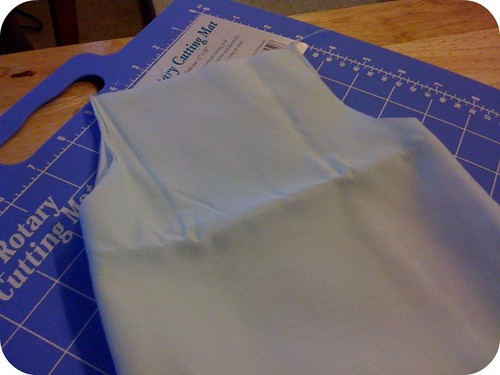
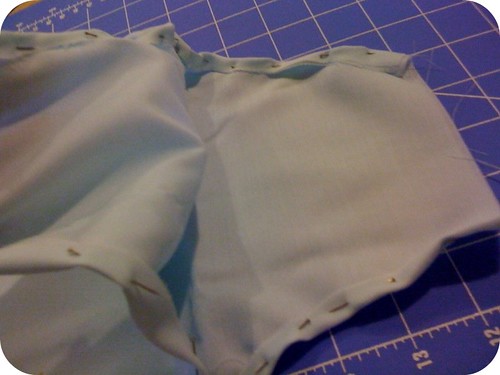
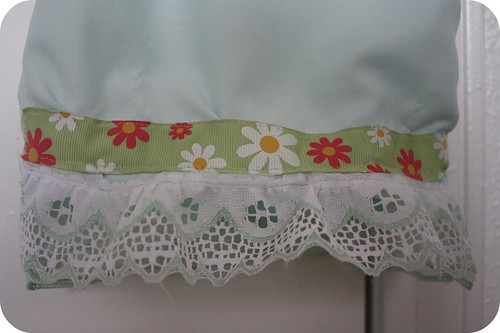
I'm not going to post a DIY for this one right now, I'm sure you could google and find lots of tutorials. I like this tutorial on Baby Rabies, but it's a little different than the one I made since I added more frill and ribbon. I found her tutorial after I made mine and quite honestly I kinda just "wong it" with this one and didn't follow measurements or a pattern besides holding it up to a couple of other dresses I've bought for her.


Not bad for my first one but I'm going to make another attempt soon!I was hoping it would come out about 3 month-size but it's really small, more like newborn size. So hopefully she'll be more around 7lbs when she's born and not like her more than 10lb daddy! We'll see!

Promise the next one I make (if it's cuter) I'll post all my own DIY instructions so you can make your own pillowcase dress!

What do you think? Like it?

Sunday, July 19, 2009

The Baby Shower--Diaper Cake Tutorial!

The baby shower was a SUCCESS! Did I mention it was the first ever baby shower I hosted? I was stressed out to the nine because we had to plan it so soon. One of the planners is moving next month and we all had to plan around our vacations. Considering all of that I think it turned out really well! I'll add another post later with more info on the games we played, more pictures of friends and everything, but this post I wanted to dedicate to my gift to her... A diaper cake.

You may remember the first one I made... Lopsided. And the stand was pretty lame (actually I did cut it in a circle later I didn't hand it to her like that!). I think the problem I had was the fact that I stacked all of the diapers on one another and didn't have a solid base in between them. With this one I read a diaper cake tutorial online that helped. And I'm going to post my own version here for you all to see! I wanted to do a video blog but I was in too much of a hurry, so I hope this helps!
First, don't be like me. I went to Hobby Lobby and pranced around the ribbon section for a long time trying to decide which color I wanted. If you were on Twitter at that time you were probably one of the people who helped me-THANK YOU! My husband was waiting in the car and after (I'm embarrassed to say)... A half hour!! ..He came storming in looking for me! Luckily I had narrowed it down to this color.

Heidi (my friend) didn't want "pink" and the theme in her baby's room is "tropical sunset" so I went with orange ribbon. You'll see what this is for soon.

Next I bought flowers for the topper... Some people use stuffed animals, but I had a vision in mind and flowers fit into that better.
I found this for a dollar and thought it could make a nice touch. I didn't know how I'd fit it all in at the time but I just planned to figure it out from home.
Next I bought a tall (about a foot) cardboard cylinder (maybe 4-6in around) to use to make a stand. I also bought a big piece of cardboard (about $1.50) to use as the base.
Then finally, yes, I bought diapers. Some friends on Twitter told me the Pampers Swaddlers are best cause they're all white, but I think any kind works. Someone told me they've made one with cloth diapers, which would be cool but WAY more expensive! These kind were soft but a little pricier than the other disposables ($9.90 for a box of 40 sz1) I ended up having to send my husband out to buy another bag (and to be honest I'm surprised he found the right ones), but I only used about 10 out of the second bag... So about 50 for me, total.
Now to making it... First I rolled up all of the diapers. I bought a 200 box of clear headbands for $2. I rolled up the diapers. You can do it either way, but I try to keep the size with print on the inside.

I cut out circles for the base, I used a large dinner plate then a smaller salad plate and then a bowl for my sizes.
I covered the circles with tissue paper, so if it shows at all it's white.
I cut the cylinder thing into two diaper-height cylinders. Then I glued it onto the cardboard circles. I put the bottom and middle layer together first before adding the top, smallest circle.

After that I added more tissue paper around the edges of the circle so it could look pretty--I dunno, you don't have to do that. I also added some greenery to the smallest circle. Sorry I don't have pictures of that. I just used hot glue and scrunched it up, and glued it around the edges.

Then, I wrapped the diapers around the bottom layer (the bigger circle with the diaper-height cylinder in the middle). I did two layers, so it's thicker. I used a big rubberband to hold them all together... you need four hands to get it to stay, so hubby came to help me here.

On the middle level I did the same exact thing except just one layer of diapers around the middle cylinder. Same thing... Four hands to add the rubber band to hold it all. --At this point it may look lopsided and weird but done worry, trust me, read on!

Now you add the top layer--The smallest, bowl-sized circle. Here I used a smaller cardboard cylinder--An empty toilet paper roll was the perfect size, I didn't even have to cut it--and I wrapped a layer of diapers around it.

Then is the fun part!! Add the ribbon around each layer to cover up the rubber bands. Used hot glue just to close the ends of the ribbon together, you don't have to glue around the whole cake. I tried to hot glue each layer together near in the same spot so I could cover them. And then add flowers and go crazy! I cut some of the greenery around the flowers off in the beginning to add some flare underneath the diapers on the bottom and top layers, and I added some flowers to hide where I glued the ribbon ends together, and just glued them to sporadic parts of the diapercake to make it look nice.After adding the ribbon is when I really noticed it all coming together. I didn't even ask my husband what he thought before he noticed what I was doing and said "That looks really good Jenn!" It made my day! Since then I've been showing pictures to EVERYONE including YOU! So tell your friends! I'm really proud, and Heidi LOVED it! She can use the diapers if she wants but she said she never wants to take it apart, but keep it as a decoration in the nursery (which may be a good thing cause I went a little crazy with the glue in some spots).

I hope this little tutorial helps! I've never done a craft how-to before (maybe because I'm not crafty), but this was fun! Maybe it'll motivate me to do more! If you have questions feel free to ask me in the comments section! This was only my second one, but it was a HUGE improvement in my opinion!

Let me know what you think!